Your complete guide to image focal points in Squarespace
Squarespace has always been really great with integrating creative tools on their platform and one that saves us a bunch of time on outside design platforms like Photoshop or Canva is the ability to adjust the Image Focal Point on an image.
What is an Image Focal Point?
In Squarespace, the "focal point" of the image sets the point of focus of an image and gives you control over where the image is centered. This allows you to reposition the image as you’d like without needing to crop it further or adjust it manually on desktop and mobile views.
Here are some examples of how adjusting the image focal point can change the way your website looks:
Image Blocks - Before Adjustment
Blog Thumbnails - Before Adjustment
Banner Images - Before Adjustment
Image Blocks - After Adjustment
Blog Thumbnails - After Adjustment
Banner Images - After Adjustment
Which blocks in Squarespace have Image Focal Points?
Most image blocks in Squarespace have a focal point.
In Squarespace 7.1, you can adjust the focal point for: image blocks, gallery sections, featured images, and section background images.
In Squarespace 7.0, you can adjust the focal point for: image blocks, gallery blocks, gallery pages, featured images, and most banner images
The Basics of How Image Focal Points Work
Image focal points are relatively easy to work with. Here’s how to use them:
To adjust the image focal point of any image in Squarespace, navigate to the image that you want to center.
Double click on your image or click Edit on the image block toolbar.
You will see on your image preview that there is a dot in the center of the image. This is the focal point of the image. It will be set to the center of your image by default.
In this example, the center of the image is right under the person pouring from the Chemex.
To adjust the image focal point, click and drag this dot to where you’d like the image to center.
For example, if I’d like the image to center on the Chimex, I would drag and drop the dot there.
If I’d like the image to center on the cup of coffee, I would drag and drop the dot there.
A side-by-side of the same image with two different image focal points
Click out of the pop-up window to preview what it looks like. Don’t forget to click Done and Save once you’re done!
Adjusting image focal points can be extremely helpful with cropped images, banner images, and blocks that auto-crop images as it allows you to reframe the photo to showcase the most important parts. In the sections below, we’ll walk through some other ways that you might leverage image focal points to create the look that you want.
Image Focal Points for Images In “Fill Mode” on The Fluid Engine
Squarespace has transitioned all websites to operate on Fluid Engine which allows for more flexibility and mobile customization. One thing that they’ve added is the ability to set image blocks to the Fill Mode. This removes extra padding and expands the image to fill the container but may result in some cropping depending on the dimensions of your container. (On 7.1 Classic Editor, you can do this with the "stretch" function.) An easy to remedy unsightly cropping is by adjusting the image focal point.
Here’s how you would set the image focal point for images in Fill Mode on the Fluid Engine:
Add an image block and upload an image to a Squarespace page with Fluid Engine. The image will be set by default to Fit Mode.
To change it to Fill Mode, click the Pencil Icon at the top of the block.
The image block settings will display on the right. Toggle your view to the Design tab.
Click Fill and the image will expand to fit in the container.
To adjust the image focal point so that it highlights the point that you want to showcase, toggle back to the Content tab.
Drag the dot on the image to where you want the image to focus. In this case, I want to center the woman in the photo, so I'm dragging the image focal point directly onto her.
A side-by-side of the same image with two different image focal points
When you’re happy with how it looks, click Done and Save in the top right corner to publish your work.
Image Focal Points for Background Images
One of the most important uses for image focal points is to set the center of a background image. This is especially important when determining what you want the focus of your mobile background to be.
Here’s how you would set the image focal point for a background banner image in Squarespace 7.1:
Navigate to the section that you’d like to add a banner background image to
Click Edit in the top left corner of the page.
Click Edit Section in the top right corner of the section.
Toggle to Background to upload your image.
Drag and drop your image into the upload space provided.
To adjust the focal point of your background image, click and drag the dot to where you’d like it to focus.
Make sure to check both the desktop and mobile views.
Default desktop and mobile views with image focal point set to center
Desktop and mobile views with image focal point adjusted
Click out of the page to get a more accurate view and click back into the background settings to continuously adjust the image focal point until the background is centered to your liking.
Viewing the background banner without the settings box in the way
When you’re happy with the positioning on both desktop and mobile, click Done and Save in the top left corner
Here’s how you would set the image focal point for a background image in Squarespace 7.0:
Some Squarespace 7.0 templates also have the ability to set background images.
Site-wide background images can be set for the following templates: Adirondack, Avenue, Aviator, Five, Forte, Momentum, Montauk, Native
Page-specific background images can be created through banners, index page sections, and cover pages for specific templates.
The following are instructions for adjusting the image focal point for a background index page section in the Brine template.
Navigate to the index section that you're adding a background image to.
Click the Cog next to the page you are trying to add a background image to.
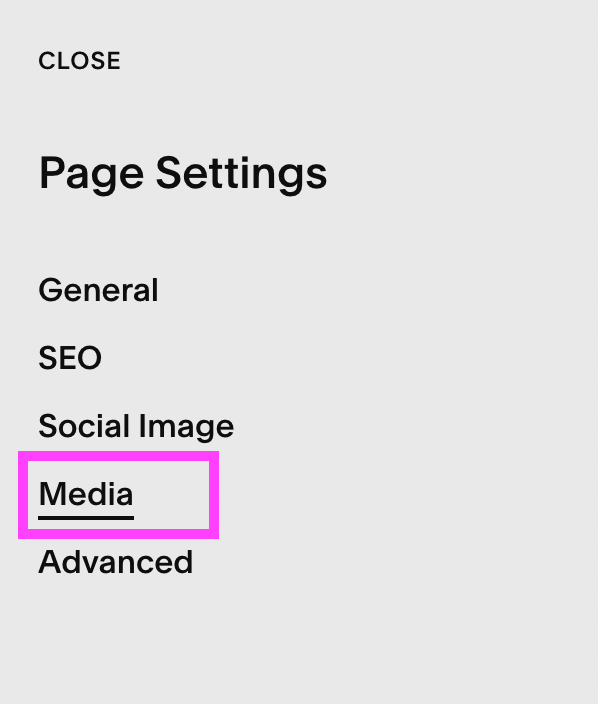
Click Media in the page settings.
Upload the background image you'd like to use by dragging and dropping it into the Add Image area.
To adjust the focal point of your background image, click and drag the dot to where you’d like it to focus.
Click Back and Save to apply your changes.
Check both desktop and mobile views to ensure that your background is set the way you like it. Make any adjustments you need back in the page settings previously described.
Default desktop and mobile views with image focal point set to center
Default desktop and mobile views with image focal point adjusted
When you’re happy with the positioning on both desktop and mobile, click Back and Save in the top left corner to apply your final changes
Image Focal Points for Images With Crops
There are certain blocks in Squarespace like the summary block, blog thumbnails, and galleries automatically crop your image to create a uniform aspect ratio across all the featured images. Adjusting the image focal point for these images allows you to showcase the most important part and aesthetically frame it to the way that you like.
Here’s how you would set the image focal point for featured images in summary blocks and blog thumbnails:
To set the image focal point of featured images in the summary blocks and blog thumbnails, we’ll have to go back to the source.
For summary blocks, click the blog, shop, or events page that you’re summarizing information from. For blog thumbnails, simply navigate to the blog that you’re trying to edit.
Click the Three Dots next to the blog post and select Settings.
You’ll see the featured image in the Content. The small circle on the photo is the image focal point.
Drag and drop the point to where you’d like the image to focus.
Select Save when you’re satisfied with how it looks.
Repeat this process for any featured photos that you’d like to shift the focus on.
These image focal point changes are updated automatically in any summary blocks.
Before Adjusting In Summary Block
After Adjusting In Summary Block
Events Thumbnails - Before
Events Thumbnails - After
Events Summary Thumbnails - Before
Events Summary Thumbnails - After
For more tips and tricks on making Fluid Engine work for you, check out these articles!
If you liked this post, Pin it to Pinterest! 👇🏻


